Configuring input forms
Index
2 Adding and deleting input form fields
4 Embedding an input form onto a web page
From the "Input" step, the structure of the entry form is created.
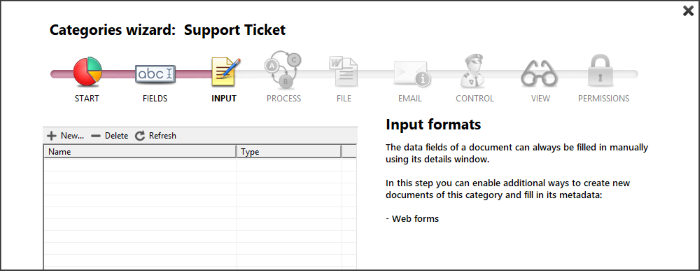
Pressing "New" opens the window to configure the structure of the form.
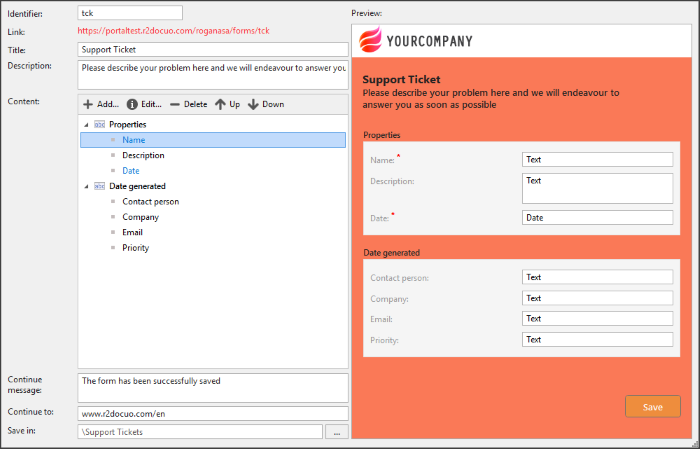
On the left appears the list of all the created fields, on the right you see the appearance that the form will have. The input form creation window is divided into three main areas:
In the upper part the options appear for:
- Enable or disable the form
- Set permissions
- Define the language
- Embed the form on a website
- Customize the appearance of the form

Just below the fields appear on the left to configure the form values
- Identifier: The name of this input form and how it will appear on the link for users * This is restricted to numbers and letters.
- Link: Here you will see the link to the form to copy and paste and also to allow you to see the final result.
- Title: The name of the form that is displayed to users.
- Description: Any additional information about the entry form that you want users to see.
- Content: Here all the metadata fields that you have created for this repository will be displayed. You can organize the order, add additional fields, delete fields and also edit the fields.

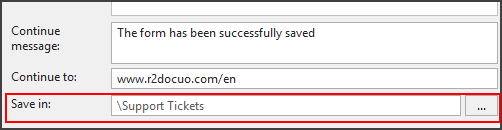
The forms create records in R2 Docuo so you have to establish the folder in which these records will be saved in. If the category has a default folder, it is proposed, otherwise the folder must be established in order to create the form.
In the field "Continue message" is the message that will appear to the user once the form has been created.
In "Continue to" you can enter a URL to which the user will be directed once they have completed the form.
On the right side
It is a preview screen where the appearance of the form is shown as the changes are made.
Adding and deleting input form fields
Please note any changes you make in the category the related form will need to be adjusted for those changes to take affect.
It is possible to remove or add fields to the form so that the end user only sees the fields that they have to complete. In the "Content" section on the left side of the form, all the fields created in the category are displayed in the order that is established in the "fields" step of the wizard.
When selecting a field or group of fields, the button bar is enabled to modify them, you can modify the position, delete or add new fields.
The "Edit" option allows you to modify the original name of the field, add a description or set a default value.
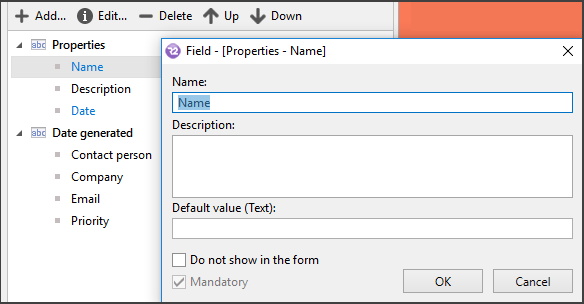
You can choose to hide some of the fields that are on the form instead of deleting them. You can do this through the edit options and selecting the option "Do not show in the form".
There are a few exceptions to this, for example mandatory fields that do not have a default value entered must still be shown on the form and completed. Other mandatory fields such drop down lists and drop down lists with search and related to other categories cannot be made hidden on the form and must be completed always.
Modifying the fields updates the appearance of the form in the preview on the right.
Modifying appearance
By default the form is shown with the logo and the custom colors of the repository.
The logo can be shown or hidden, it is not possible to change it for another, and the colors can be customized by selecting the desired color for each part of the form in the bar at the top of the window.
The "Show header" button shows or hides the logo on the form.
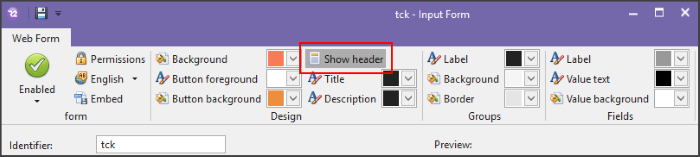
To change the colors of the form you have to select the desired color in each area, in the lower part of the configuration box of each area the name of the area to which it corresponds appears.
Design: Change the general design of the form, the background, the color of the text and that of the button.
Group: Change the appearance of field groups
Fields: Change the appearance of custom fields.
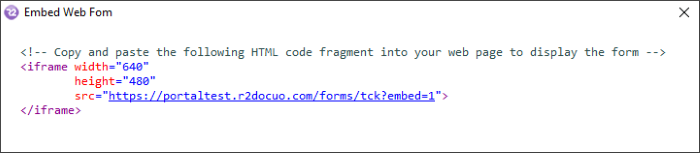
Embedding the input form onto a web page
The forms can be embedded in web pages so that anyone can access them and create a record.
To embed the form you have to press the "Embed" button and follow the instructions that appear in the window.
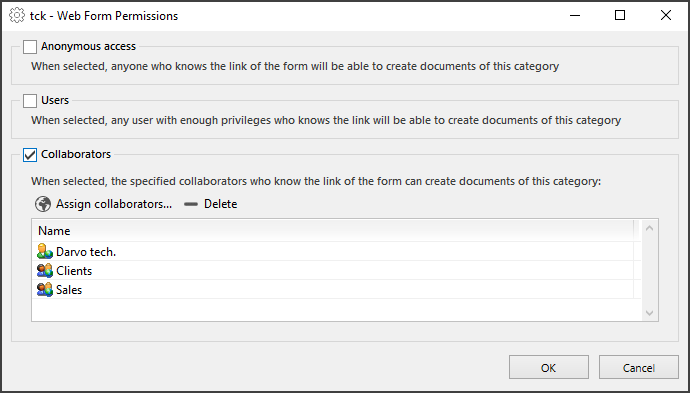
Establishing permissions
The creation of forms can be restricted by permissions, it can be a public form, only for users of R2 Docuo or only for collaborators.
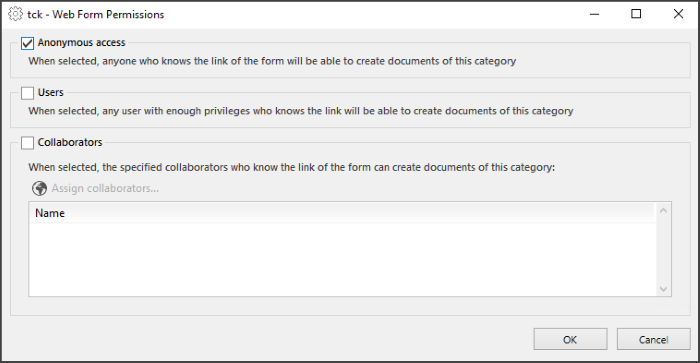
If the option "Collaborators" is selected, it is necessary to define which collaborators can create forms by clicking the "Assign collaborators" button.